

TiviMate has 3 recording options that all work fairly well. This includes live recording while watching, live recording while on channel guide, and scheduled recordings.
How To Install TiviMate V5.0.4 On Firestick/Android TV (May 2024)
This guide will show you how to install TiviMate on Firestick, Fire TV, and Android TV/Google TV devices.
We provide both a step-by-step screenshot guide and a comprehensive video tutorial to cover all aspects of this fantastic application.
This article also includes setup instructions and tips to help you maximize your experience on your preferred device. Unlike other tutorials, our guide covers every feature available within TiviMate, ensuring you get the most out of this exceptional streaming platform.
After more than a year of hiatus, the developer has finally updated TiviMate to version 5, packed with numerous advanced features and improvements. The current stable version is 5.0.4.
Here are some of the features this latest update provides:
1. Revised User Interface
2. Addition of Logout Button (About menu item)
3. New official website to manage devices (more details below)
4. Display current connection attempts if playback fails
5. Open externally when an error message displays
6. Local Recording Directory improvements
7. General Bug Fixes
TiviMate is one of the best IPTV Players available for use on any device including the Amazon Firestick, Android TV/Google TV Boxes such as BuzzTV, NVIDIA SHIELD, Chromecast, and. Google TV Box, Windows PC, and much more.
The app itself does not include live channels for streaming. However, users can integrate an M3U URL or an Xtream Code URL within the app to access live streaming.
Before proceeding with this guide, check with your current IPTV service to see if they provide access to their M3U URL or Xtream Code API.
TiviMate offers both a free version and a premium version of the service. The premium version currently costs $9.99 per year or $29.99 for a lifetime subscription.
FireStickPro suggests purchasing a premium account as it unlocks tons of features not found in the free option.
Premium Features
Those who opt for the Premium plan are provided with over a dozen valuable features including:
1. Scheduled recordings
2. Custom recurring recordings
3. Support for multiple playlists
4. Backup/Restore
5. External Video Player
6. Parental Controls
7. Picture-in-Picture
8. Favorites management
9. Catch-up
10. Customizable TV Guide update intervals
11. Customizable Panels transparency and timeout
12. Customize Groups and Channels
13. Manual Channel sorting
14. Turning on the last channel on the app start
15. Auto frame rate (AFR)
16. Reminder to automatically play channel
17. Many More
As you can see, without the upgrade, there isn’t much sense in using the app.
We recommend starting with the free app by following the installation instructions below. If you like it, you can upgrade to the premium version, and we also cover that process in this article.
In this tutorial, we are using an Amazon Fire TV Stick 4K Max. Since TiviMate is not available in the Amazon App Store, we need to first jailbreak our Firestick to side-load the app.
This will also work for Android TV/Google TV Devices such as the NVIDIA SHIELD, MECOOL Boxes, onn. Google TV Box, and more.
How to Install TiviMate on Firestick/Android TV/Google TV
Use the guides below for installation and set-up instructions for this application on your preferred device.
Step 1: Install Downloader
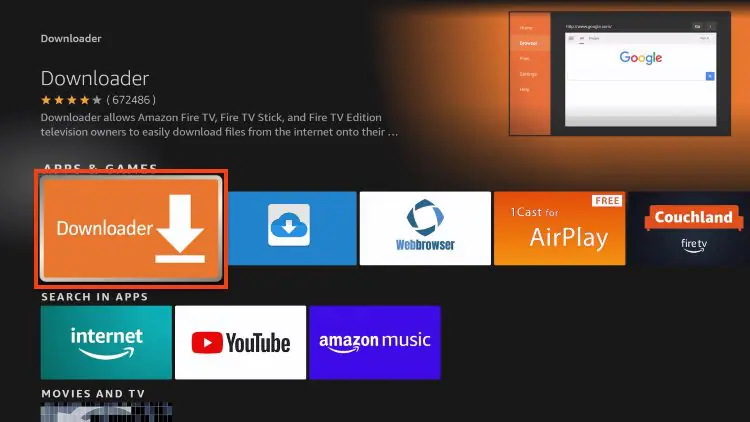
1. On your device’s home screen, navigate to the Find button, then select the Search box.
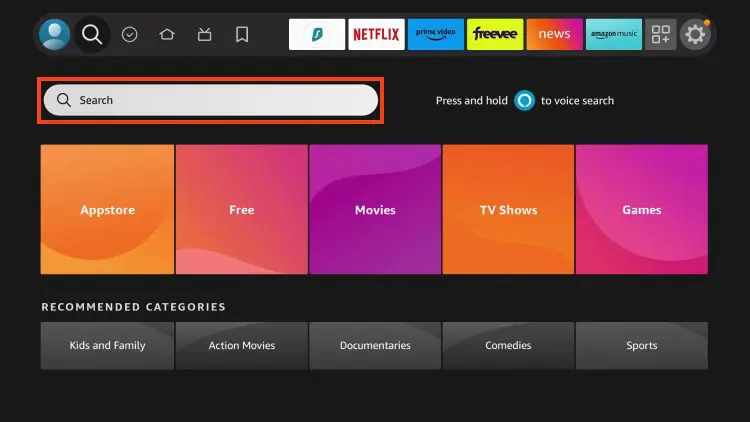
2. Search for and select Downloader.
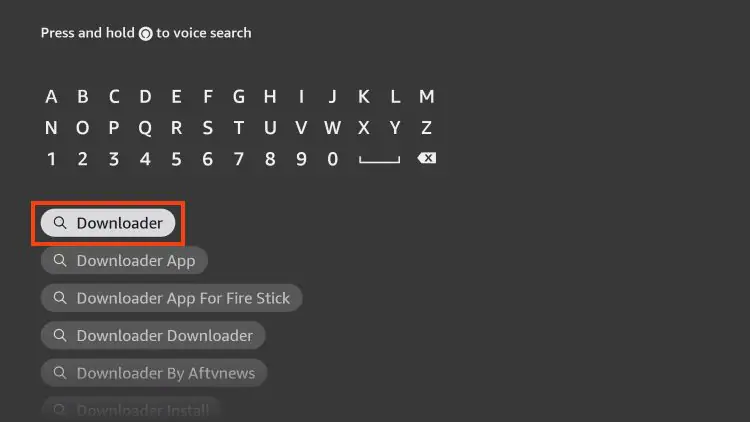
3. Choose the Downloader app.
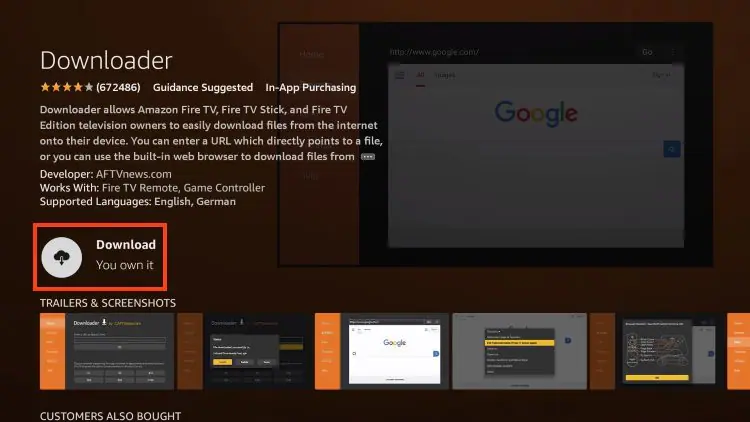
4. Click Download or Get.
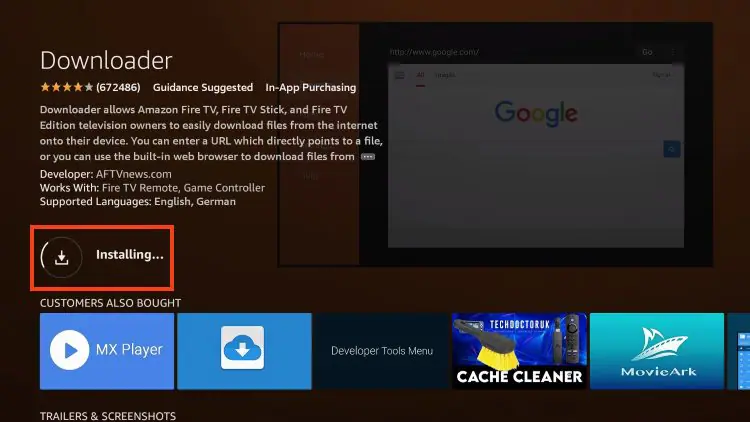
5. Wait for the app to install.
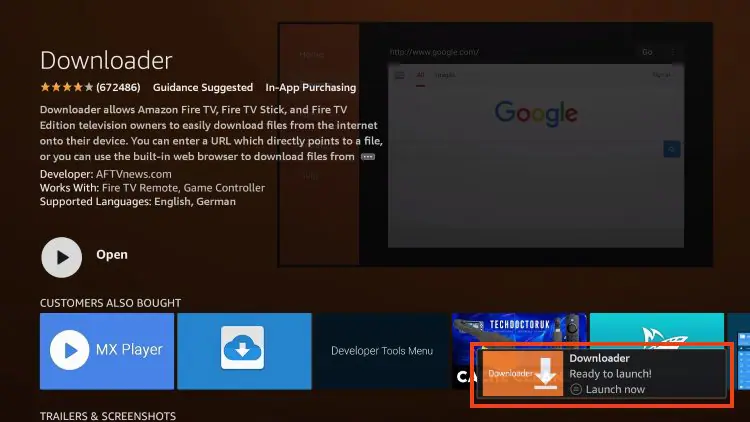
6. You will then encounter Downloader Ready to Launch! message
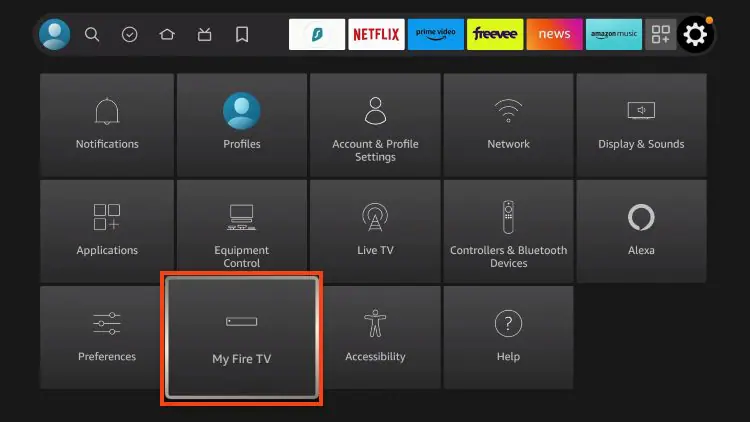
7. Return to the home screen to hover over Settings and click My Fire TV.
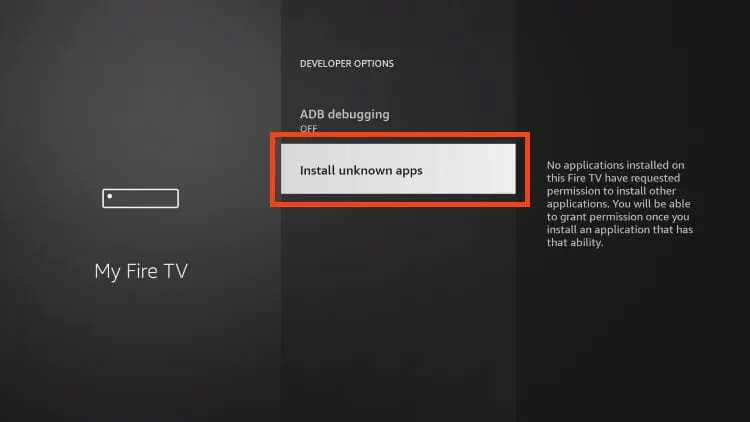
8. Choose Developer Options.
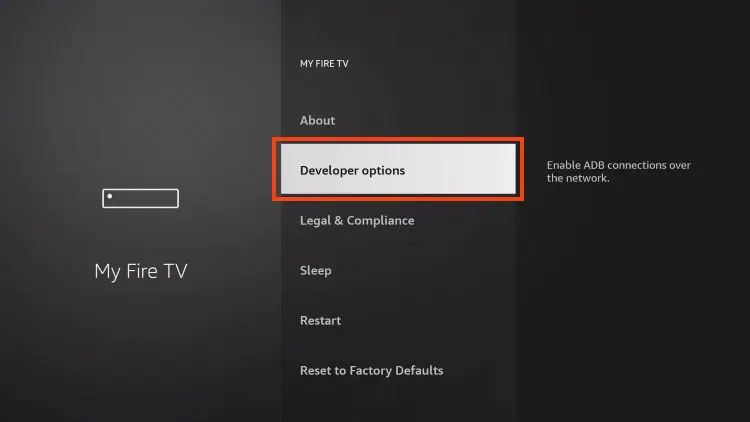
IMPORTANT: Please see the notes below if you don’t see Developer Options on your screen.
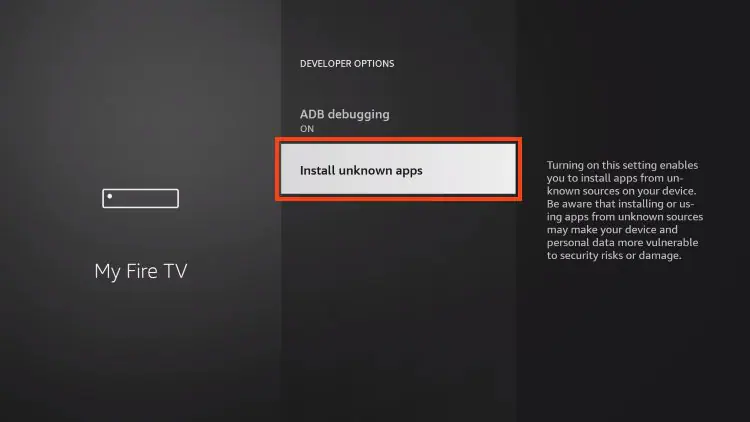
9. Click Install unknown apps.
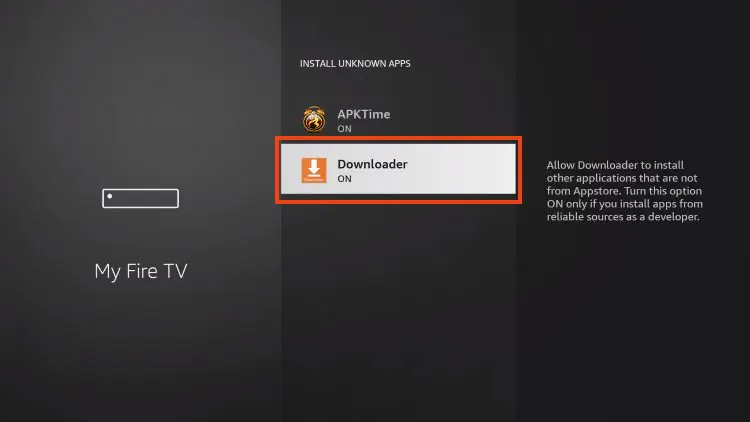
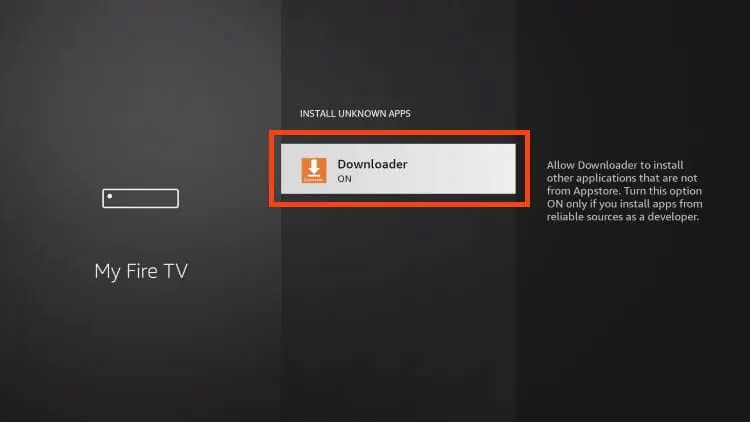
10. Find the Downloader app and click it.

11. This will turn Unknown Sources to On for the Downloader app and enable side-loading on your device.
Developer Options Not Available
If you are unable to locate developer options within settings, follow the instructions below to enable this to use the Downloader App.
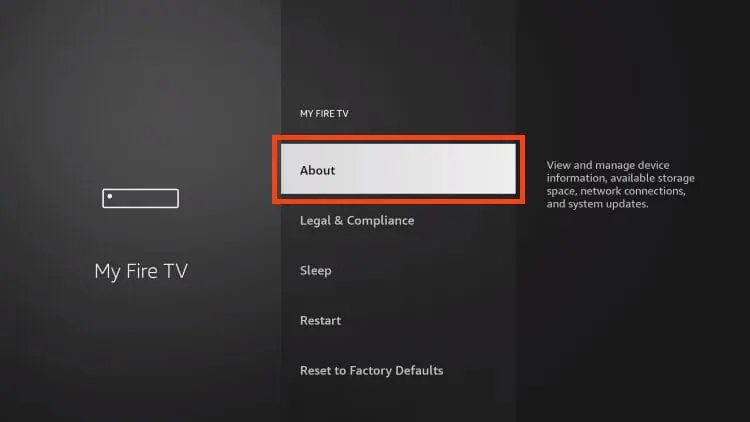
1. Hover over the Settings icon and choose My Fire TV.
2. Click About. (You will see Developer Options is not available)
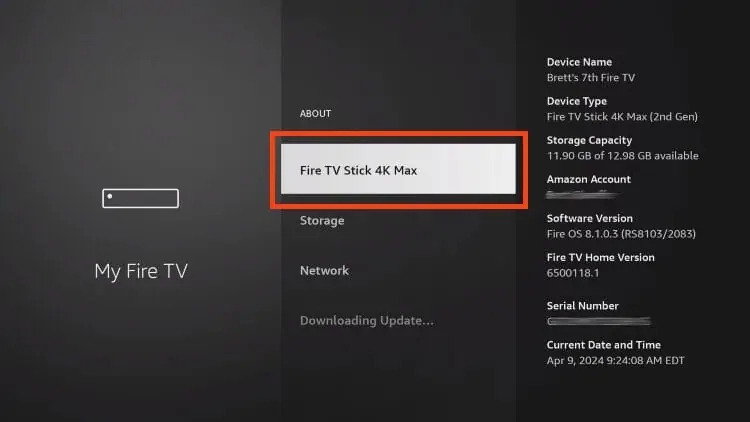
3. Click Fire TV Stick 7 times.
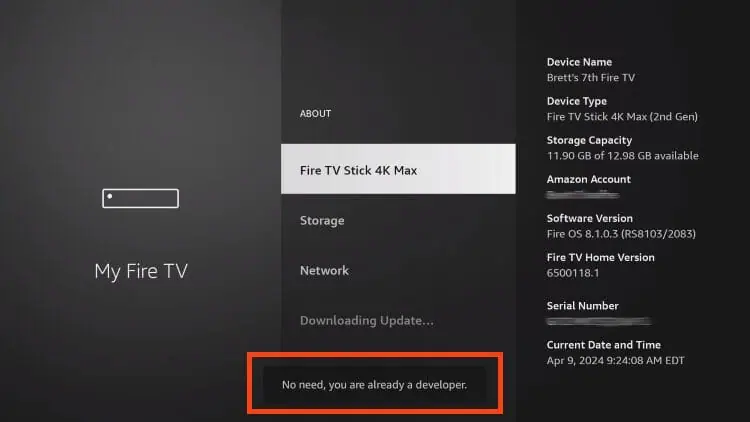
4. You will then see the message “No need, you are already a developer”.
5. Click back to return to Settings and select Developer Options
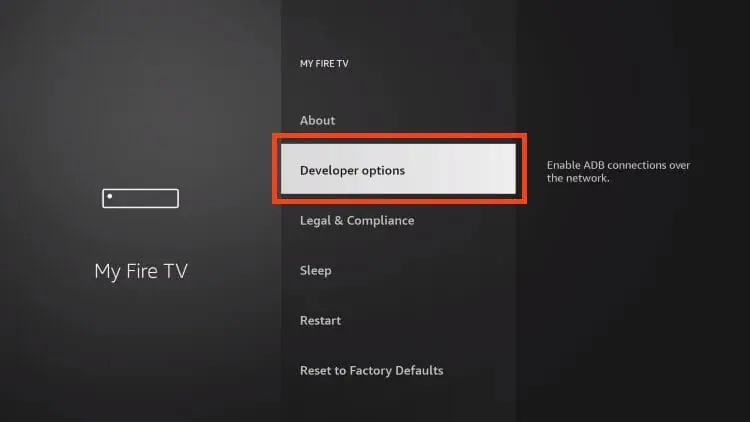
6. Select Install Unknown apps.
7. Turn on Unknown Sources for Downloader.
Now that I’ve properly prepared our device we can continue with the app installation.
Step 2: Install Tivimate
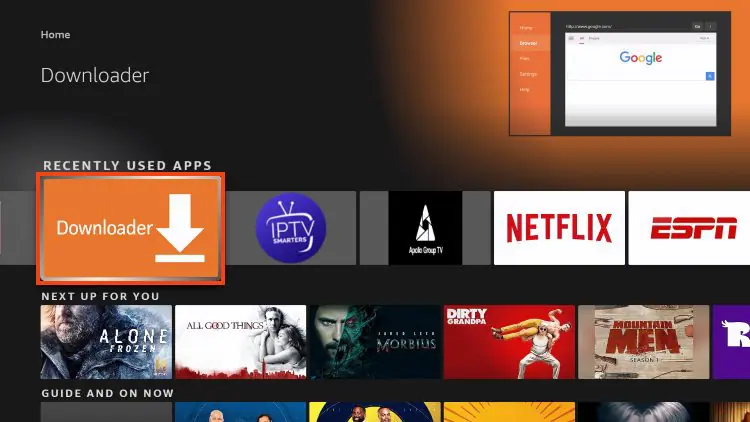
1. Launch Downloader.
2. Use your remote to highlight the Enter a URL or Search Term: section
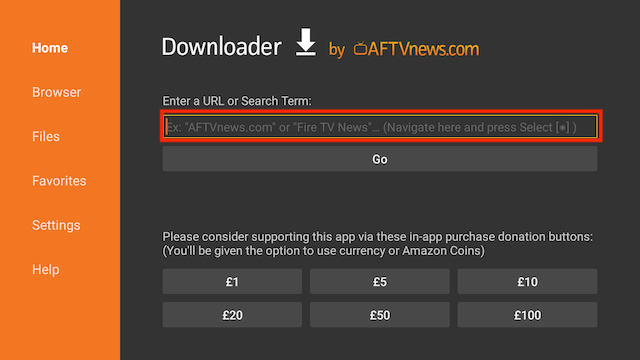
3. Enter the following code 454561 and then click Go
4. The file will start to download
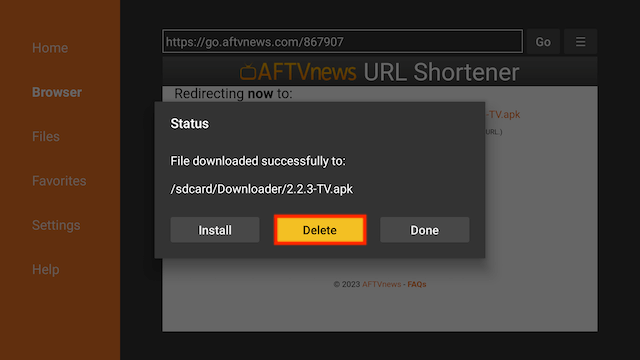
5. You will be asked if you want to install it. Select INSTALL
6. Select Done (we are going to delete the installation file to save space on your stick)
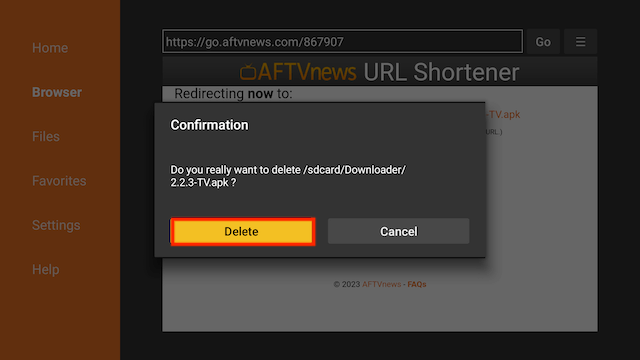
7. Select Delete
8. Select Delete again
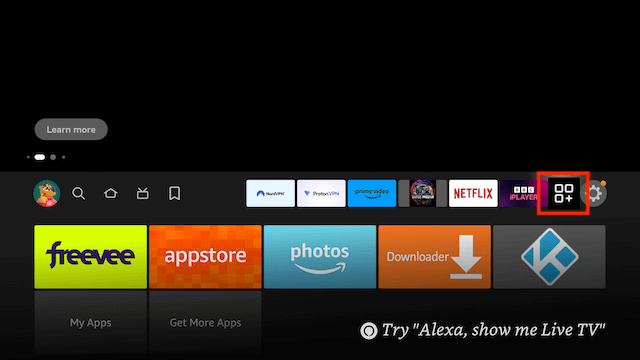
9. Go back to your Fire Stick home screen and select the APPS section
10. Select My Apps
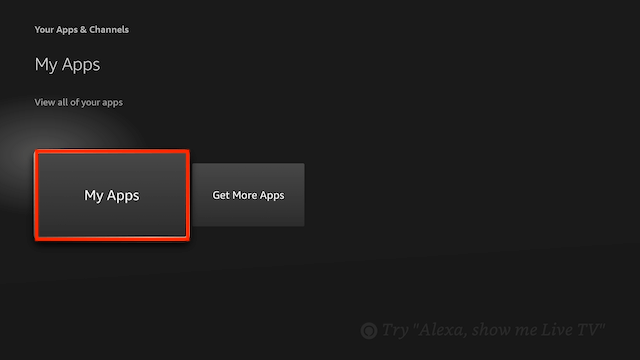
11. TiviMate will be located at the end
Installation is now complete. Continue reading to learn how to set up the app on your preferred device.
After the app installation is complete, we can open the app and authorize an IPTV Service for use.
We will guide you on how to set up a free version of Tivimate in below guide.
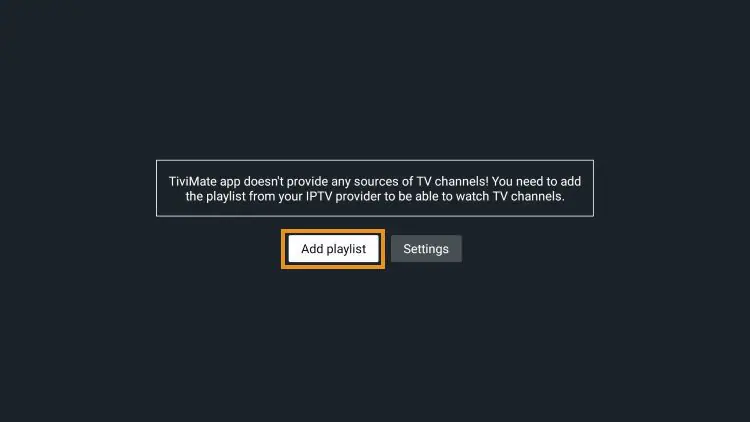
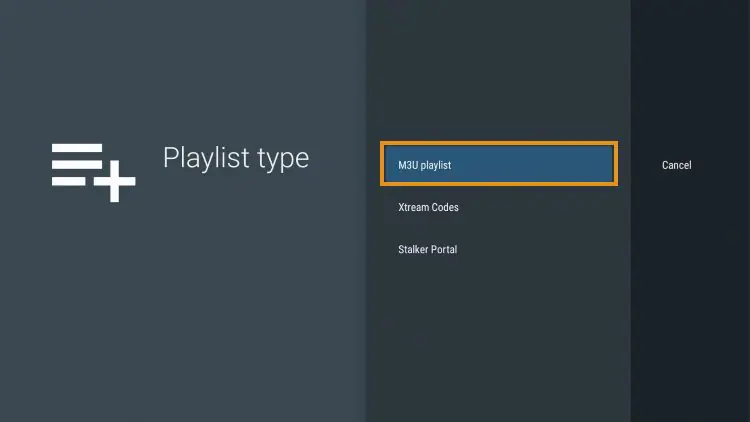
1. Open the app and click Add Playlist.
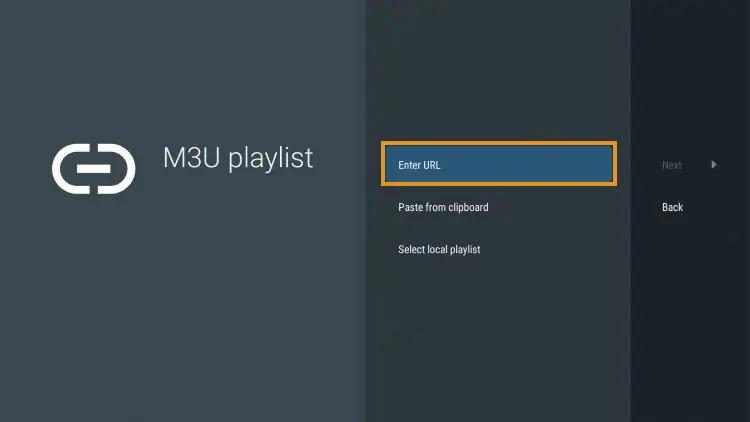
2. Choose the M3U playlist or Xtream Codes.

3. Click Enter URL.
4. Enter the M3U URL or your preferred IPTV Service.
In this guide, we are using the free Samsung TV Plus M3U URL, which offers hundreds of free live channels.
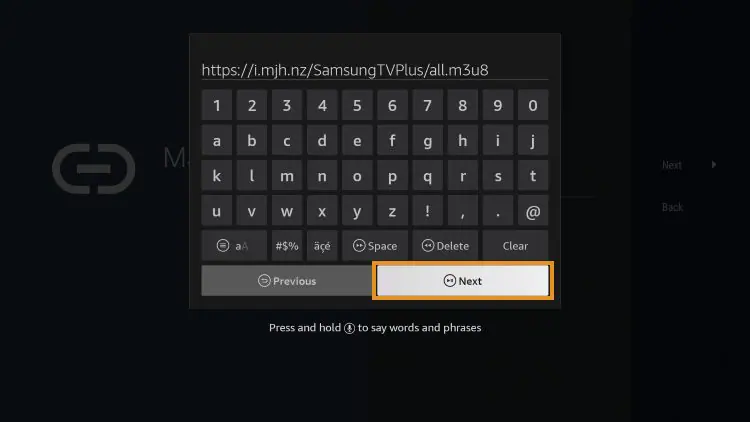
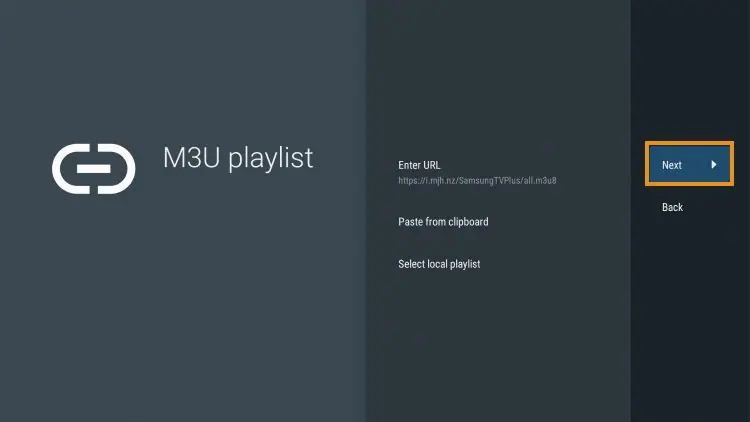
5. Click Next.
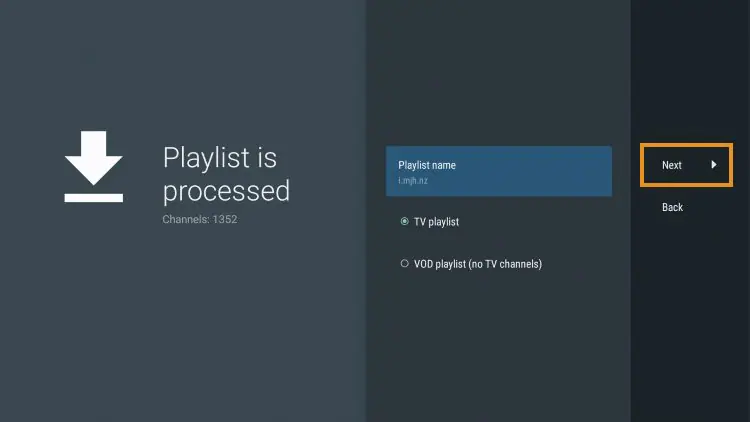
6. You will then see a Playlist is processed message with Channel count and your Playlist name. Click Next.
7. If the EPG URL does not auto-import, you can insert it here.
Some IPTV providers offer a separate M3U URL for your EPG. Click Done.
8. Choose Your Playlist.
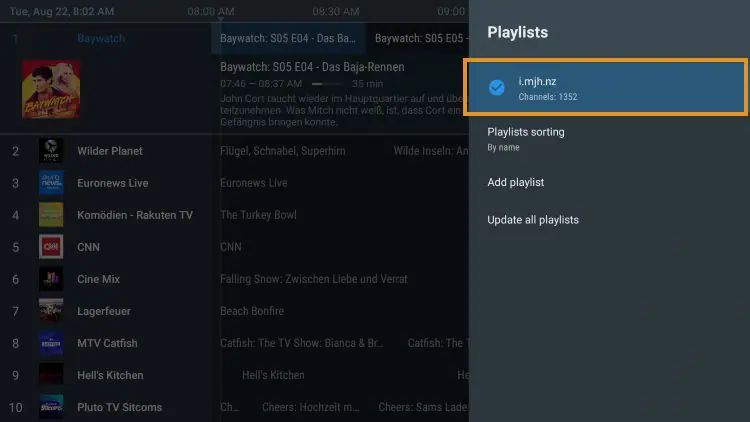
9. Click OK.
10. TV Guide will import and you are able to start viewing!
It is important to note that those who choose to use the free app will miss out on tons of fabulous features.
For example, if you try adding a channel or channels to favorites you will be prompted with the following message:

For those who wish to use the free version, simply click Cancel and continue using the app at no charge
If you purchase the premium option through the Companion app, we can log in for added benefits.
If you need to create an account, you can follow the instructions below on how to do that through the Google Play Store.
How to Purchase & Set Up a Premium Account
The guide below provides instructions to purchase and set up TiviMate Premium.
Step 1 – Install the TiviMate Companion App via Google Play Store
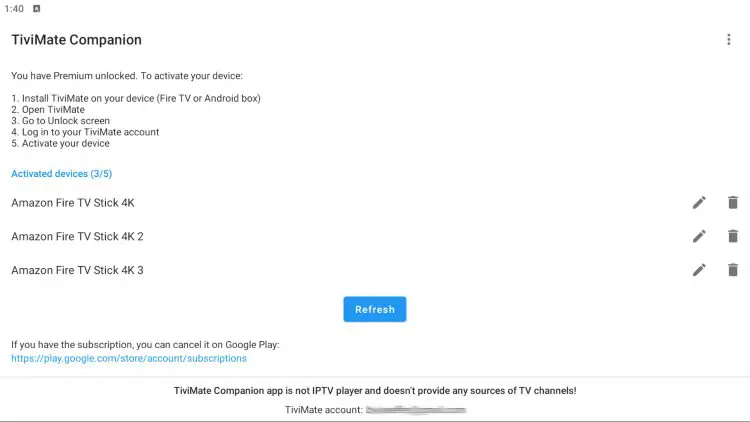
The premium version costs only $9.99 per year, with a lifetime subscription option available for $29.99. This subscription covers up to five devices, which you can manage within the Companion App.
Before activating the premium features, users must register for an account via the Companion App. This app is only available in the Google Play Store, so it must be installed on an Android device or through BlueStacks or another Android emulator.
If you do not have an Android phone or device, you will need to install the BlueStacks emulator on your PC to access the Google Play Store.
Note: If you’re using a generic Android TV Box with stock Android, you can install the Companion app through the Google Play Store. Devices running the true Android TV operating system such as NVIDIA SHIELD don’t include this app so you will need to set up an account on an Android phone, tablet, or through BlueStacks.
Once installed, use the instructions below to set up a premium account.
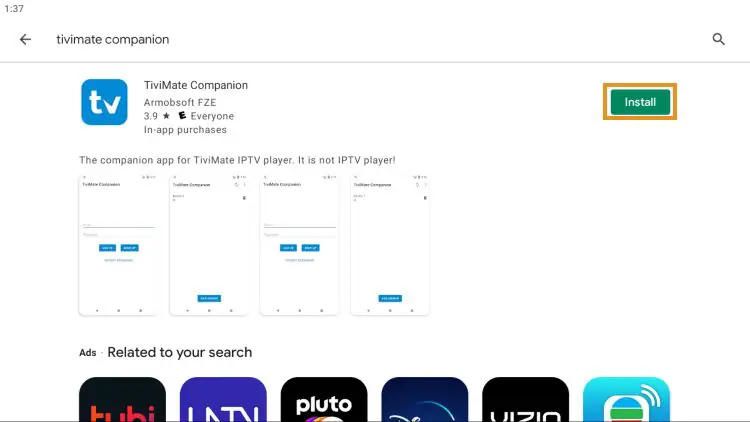
1. Open the Google Play Store on your Android device. In this tutorial, we are using BlueStacks on a Windows PC. Search for “TiviMate Companion” and select the first result.

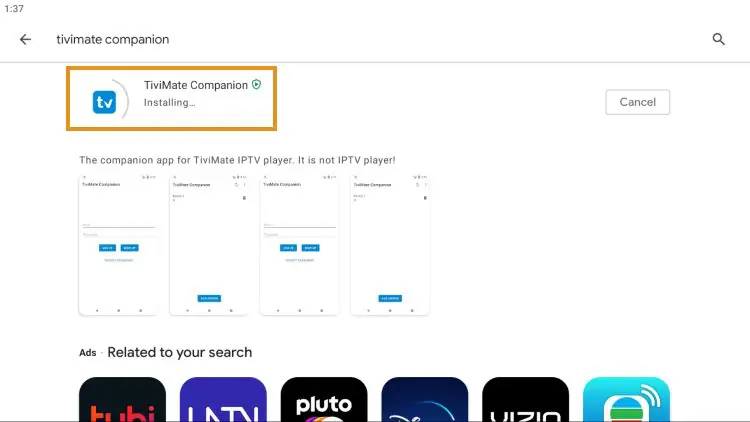
2. Click Install.
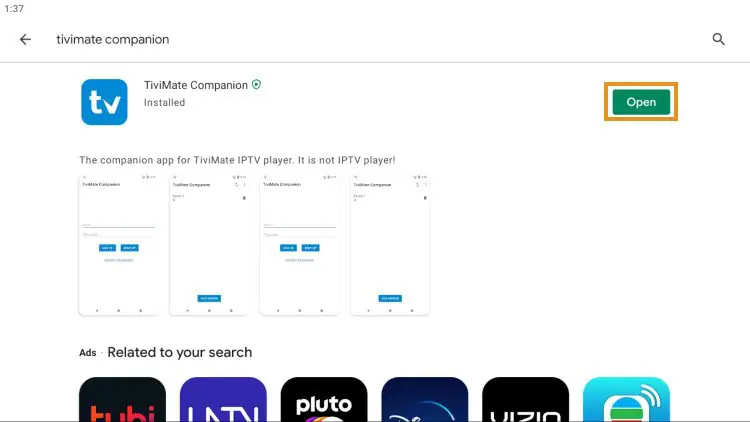
3. Wait for the app to install.
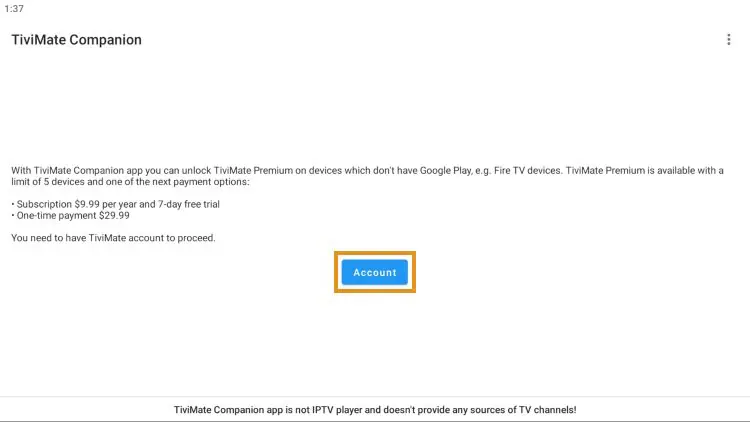
4. Click Open.
5. Click Account.
6. Enter your preferred username and password and select Sign up.
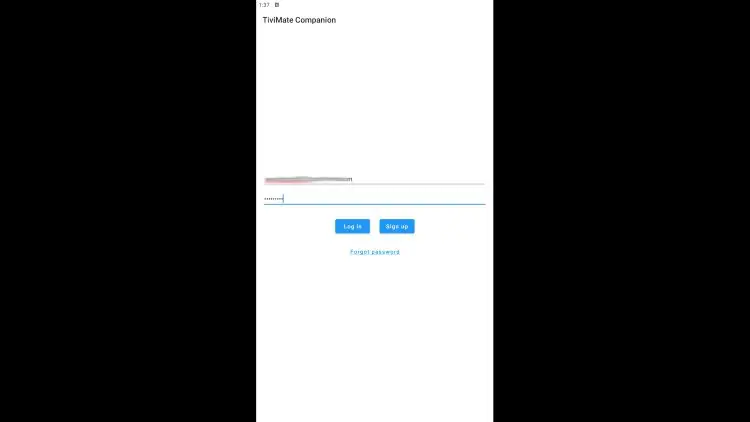
7. Re-enter your password and click Create account.

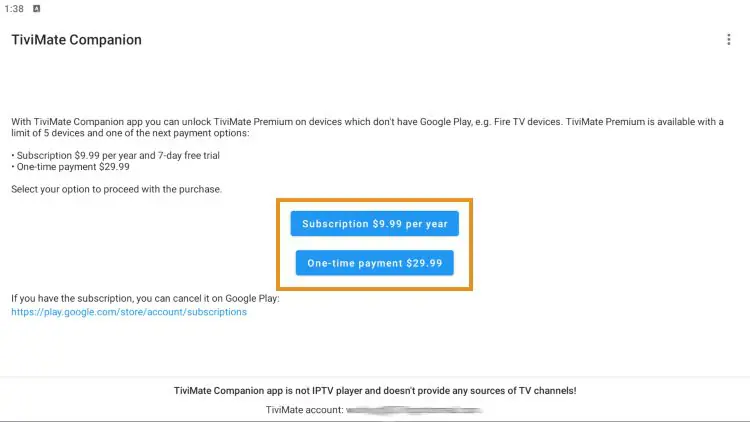
8. Choose the subscription package of your choice and enter your payment information.
9. Registration is complete!
Be sure to write down or remember your login information to sign into the app.
Step 2 -Login to TiviMate Premium
After you have created your Premium account, you can log in to the service within the app previously installed.
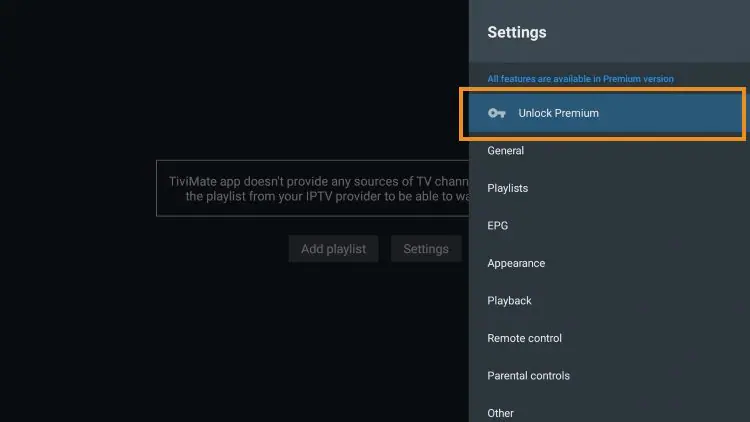
1. From the home screen, select Settings.
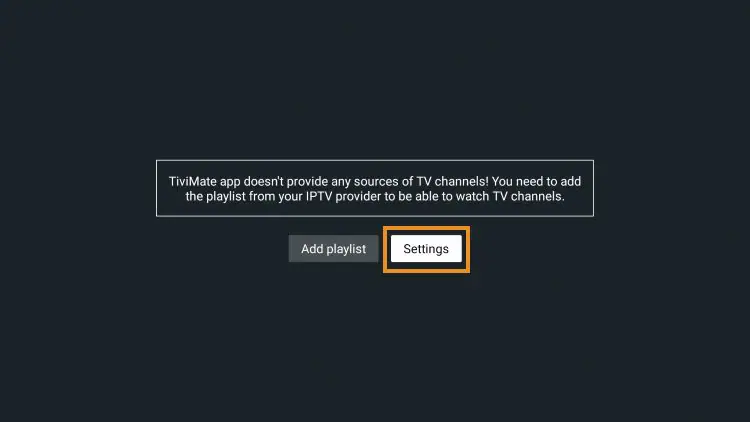
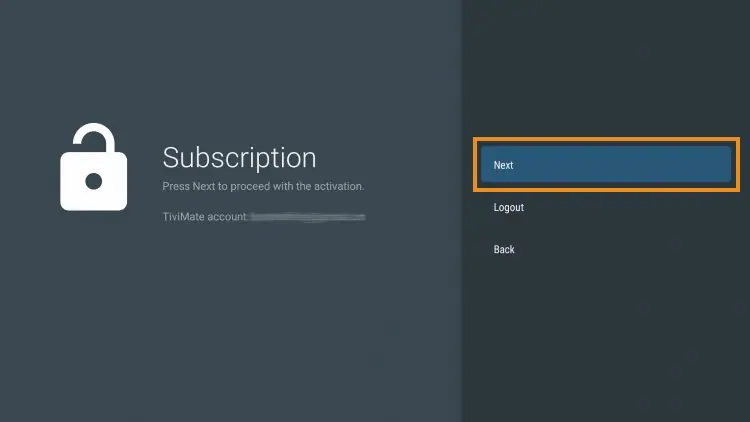
2. Choose Unlock Premium.
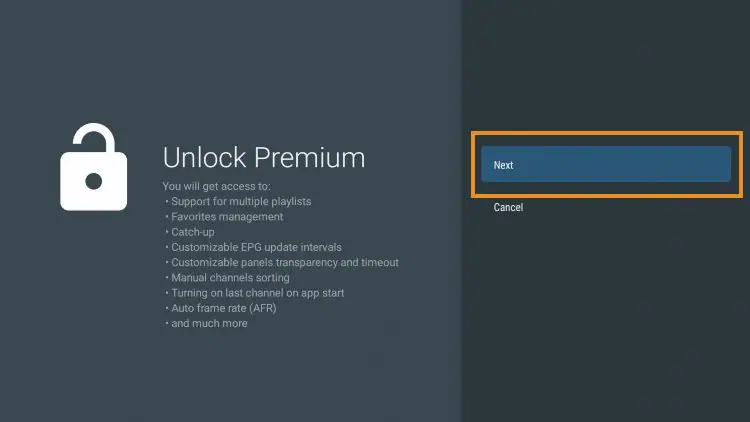
3. Click Next.
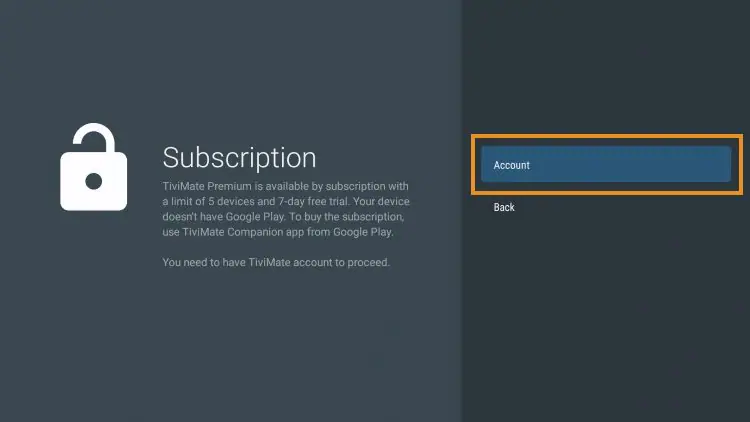
4. Choose Account.
5. Enter your login credentials.
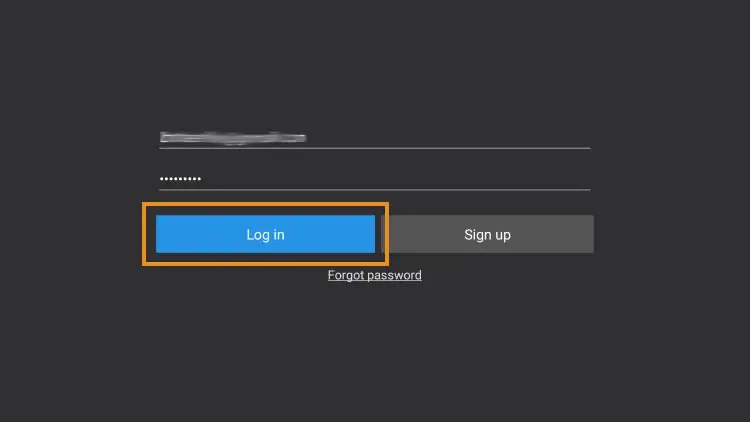
6. Click Next.
7. Enter the device name of your choice and click Activate.
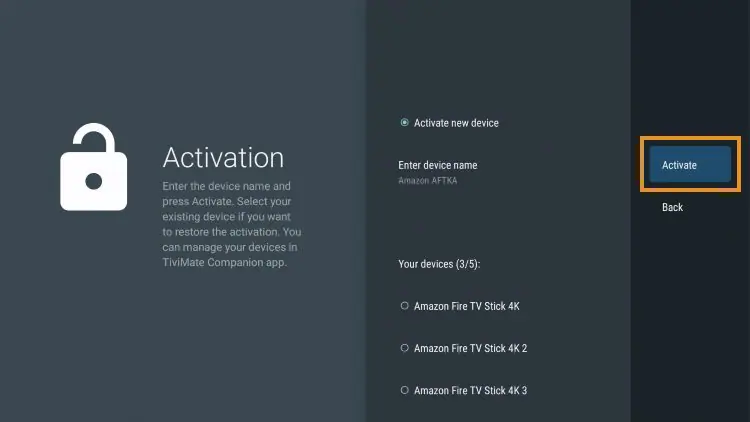
8. Click OK.
That’s it! Once logged in, you will have access to all the advanced features of the app, ensuring an enjoyable live-streaming experience.
Details & Features
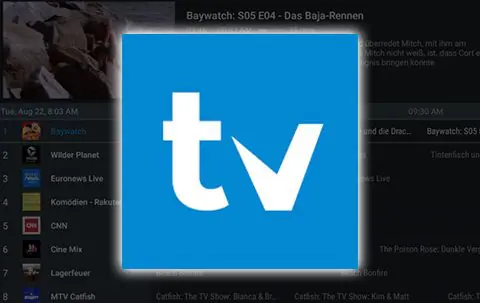
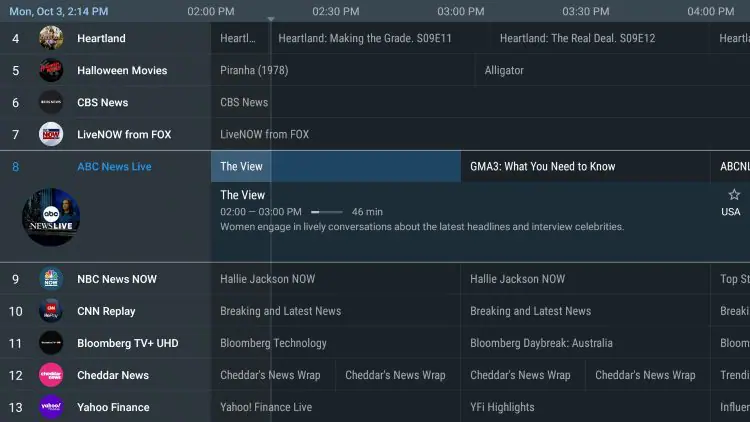
Upon installing TiviMate, you will immediately notice the unique interface it provides. This varies from other IPTV Players and works fabulously.
The menu bar on the left lists your Playlist Categories or “Groups” as they are referred to in the app. These can be hidden, removed, and managed all within the Settings.
This is a great way to eliminate any unwanted Channel lists that you don’t use or need.
Because of the uncertainty of live TV services, FireStickPro always suggests having a backup.
With this app, users can integrate multiple services or “Playlists” within the app meaning you can combine two or more Services into one!
This is a great way to ensure your live streaming is always available and manage your favorite channels across multiple platforms.
Best of all, the app works extremely fast on any device you prefer including Firestick, Android TV, Google TV, and more.
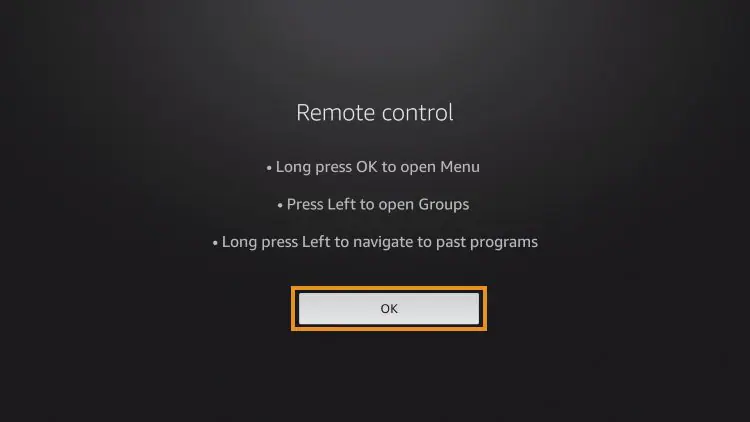
Navigating this app is a breeze when using your streaming device’s remote. If using a Firestick, the following options are available:
1. Select Button: Opens Channel
2. Back Button: Shows Groups/Return to Guide
3. Left Button: Scrolls to Previous Program
4. Right Button: Scrolls to Next Program
5. Up Button: Scrolls Up through Channels
6. Down Button: Scrolls Down through Channels
7. Rewind Button: Scrolls Channels Up without changing the channel
8. Fast Forward: Scrolls Channels Down without changing the channel
After playing a Channel, clicking the select button will generate various options:
This includes the ability to view recent channels and quickly select as well as re-open the TV Guide with your current channel playing in the background:
Groups
The Group options within TiviMate sets it apart from other IPTV apps. Using this to your advantage is a great way to condense your TV streaming experience.
To edit these, simply open the TV Guide and click the Menu Button (3 horizontal lines) on your remote. Then click Group options:
1. Select Manage groups
2. To remove an unwanted or unused Group, simply switch the toggle off:
3. Only highlighted groups will now be visible on the left-side menu bar of the home screen. To adjust the order of these, simply click Manage positions:
4. Click to highlight and adjust the group position to your preference! We suggest using the Favorites Tab at the top for a personal streaming experience.
NOTE: FireStickPro recommends adding your preferred channels to Favorites to get the most out of this app. This will enable all navigational features to work within the Favorites “Group” meaning all scrolling and selection will be through your Favorite Channels!
Favorites
There are a few ways to add a Channel to Favorites.
The first option is to long click when playing a Channel and selecting “Add to Favorites”
After selecting a channel, users have numerous options within the player. You can easily access the channel list by pressing the down button.
This will prompt quick access to the Channel list without returning to the EPG.
EPG (Electronic Program Guide)
Using the built-in EPG is the best way to browse through your channel selections and more.
Here is the recommended method to set up the EPG within TiviMate.
- Open Settings and select EPG
- Click Past Days to Keep EPG and set it to 1
- Update Intervals – 24 hours
- Update on app start – Off
- Update on Playlist Change – On
Picture in Picture
Another fabulous feature available is the Picture-in-Picture setting that will let you browse other apps/tools on your device while continuing to stream live content.
You can find this in the full-screen mode of your preferred channel.
This will keep TiviMate playing in the background while you are able to access other options on your preferred device!
TiviMate Settings
Within the Settings are the following provided options:
There are a few options within the app’s settings that are worth checking out. One thing we suggest is enabling the confirmation message prior to exiting out.
This way, you will not accidentally close the app by pressing the back button too many times:
Another notable feature is the auto-update option for the TV guide. This will ensure your guide is always current:
Parental Controls
For those who wish to use Parental Controls, these can also be established within the Parental controls Category.
This includes setting and using a PIN Number for access. These can be adjusted to require PIN for Playlists, TV Guide, Group options, and more.
To go along with the Parental Controls is also the ability to block various channels.
you can find this option within the Settings of any channel.
Within the Settings option are tons of features and options that will help you get the most out of your Live TV experience.
Adjusting these will help cater the app to your specific preferences. We suggest checking out all of these Categories to ensure the app is set to your liking.
Subtitles
While other IPTV players fall short when it comes to Closed Captioning, TiviMate does not.
That being said, working subtitles will vary from Channel to Channel within the app.
How To Enable Subtitles:
1. Open and play your preferred content
2. Long Click the Select button on your remote to open options and choose CC
3. Change toggle from “Off” to “Closed captions 1”
4. Subtitles will now load for your content
TiviMate External Video Player
Another excellent feature that TiviMate provides is the ability to use external video players.
This is something we don’t always see in IPTV Players that usually have a built-in video player.
Users can easily choose to open an external player after making a channel selection.
We could go on and on about all of the features TiviMate provides, however, your best bet is to try it yourself to see just how extensive these options are!
Recording Capabilities
In my opinion, one of the best features of this application is the ability to schedule recordings. Guess what?
You can even schedule multiple recordings at the same time!
NOTE: Prior to recording it’s important to make sure you have a USB Drive that’s properly formatted as FAT32.
TiviMate has 3 recording options that all work fairly well. This includes live recording while watching, live recording while on channel guide, and scheduled recordings.
To schedule a recording, select “Custom Recording” within the channel guide by long-pressing the select button on your remote. This will enable you to choose “New Recording” and then schedule the recording by selecting your channel and timeframe.
Audio Sync
If you’re experiencing audio sync issues while watching a channel, you can adjust it using the audio sync feature. Simply press the select button on your remote while watching a channel and adjust the offset up or down until the audio matches the video.
Overall, the possibilities within the TiviMate app are endless. Because of its easy navigation and fast streaming abilities, it is sure to be a favorite among all IPTV users.
TiviMate Official Website
Recently, the developer has created an official website for the application that provides a few details and screenshots with information. However, the best use of this website is the ability to log in to your TiviMate premium account and view all activated devices.
TiviMate Review
TiviMate is one of the most popular players available today and for good reason.
As noted above, the service provides both a Free and Premium version with the Premium version offering advanced features which we list below.
These features truly set it apart from other options and make it an all-inclusive streaming platform for any IPTV Service you prefer.
The TiviMate app provides a fabulous user interface with a built-in Electronic Program Guide to browse content.
It is made to work on various streaming devices, however, is also available for mobile phones and tablets for live streaming anywhere you are.
While setting up the Premium version is a bit of a process, it is worth it in the end for all the fabulous features it provides.
The app itself is extremely fast with little to no lag and even provides the ability to record which we don’t often see with various IPTV Players.
Best of all, the developers continually update the app to keep it running at peak performance for a fabulous viewing experience.
Frequently Asked Questions
What is TiviMate?
TiviMate is a popular IPTV player that pairs with any IPTV service for an improved streaming experience.
Is Premium worth it?
Yes. The extensive features provided with TiviMate Premium make it well worth the cost for a yearly or lifetime subscription.
Is This App Legal?
Yes. This app is 100% legal to install and use. It is available in reputable app stores including the Google Play Store.
Is TiviMate Safe?
Yes, this app is safe to install and use as we show above with the VirusTotal Scan.
What Devices can this app be Installed on?
This app is available for installation on any device that runs the Android operating system. This includes the Amazon Firestick, Fire TV, and any Android TV/Google TV device.
Last modified: May 29, 2024
[mc4wp_form id="5878"]